
Die Idee hab ich von Novaspirit Tech. Ich nutze hier aber kein Docker.
Schlankes Alpine Linux mit einem XFCE Desktop das im Webbrowser läuft. (Sound funktioniert nicht.)
20.04.2024 - Anleitung aktualisiert (Proxmox 8, Alpine Linux 3.19)
Installation
Neuen Container mit dem alpine-3.19-default_20240207_amd64.tar.xz Template erstellen.
8 GB Harddisk, 1 CPU und 1 GB RAM sind erstmal ausreichend.
Container starten und updaten.
apk update
apk upgrade
Benötigte Pakete installieren.
apk add --no-cache sudo git xfce4 xfce4-terminal faenza-icon-theme bash python3 tigervnc
Benutzer alpine anlegen, der Gruppe wheel hinzufügen und ein Passwort vergeben.
adduser -h /home/alpine -s /bin/bash -S -D alpine
addgroup alpine wheel
passwd alpine
Mit visudo die Gruppe wheel in der /etc/sudoers aktivieren.
visudo

## Uncomment to allow members of group wheel to execute any command
%wheel ALL=(ALL:ALL) ALL
noVNC und websockify installieren
git clone https://github.com/novnc/noVNC /opt/noVNC
git clone https://github.com/novnc/websockify /opt/noVNC/utils/websockify
Jetzt als alpine user einloggen.
VNC Passwort vergeben. (nach vncpasswd muss zweimal die Enter Taste gedrückt werden)
vncpasswd
Would you like to enter a view-only password (y/n)? n
A view-only password is not used
VNC Server starten.
vncserver :99 &

Using desktop session xfce
New 'desktop:99 (alpine)' desktop is desktop:99
Starting desktop session xfce

Xvnc TigerVNC 1.12.0 - built May  8 2022 02:27:53
Copyright (C) 1999-2021 TigerVNC Team and many others (see README.rst)
See https://www.tigervnc.org for information on TigerVNC.
Underlying X server release 12014000, The X.Org Foundation

--- SNIP --- (Fehlermeldungen ignorieren)
noVNC Proxy Server starten.
/opt/noVNC/utils/novnc_proxy --vnc localhost:5999

Warning: could not find self.pem
Using local websockify at /opt/noVNC/utils/websockify/run
Starting webserver and WebSockets proxy on port 6080
/opt/noVNC/utils/websockify/websockify/websocket.py:31: UserWarning: no 'numpy' module, HyBi protocol will be slower
  warnings.warn("no 'numpy' module, HyBi protocol will be slower")
WebSocket server settings:
  - Listen on :6080
  - Web server. Web root: /opt/noVNC
  - No SSL/TLS support (no cert file)
  - proxying from :6080 to localhost:5999

Navigate to this URL:

    http://desktop:6080/vnc.html?host=deskop&port=6080

Press Ctrl-C to exit
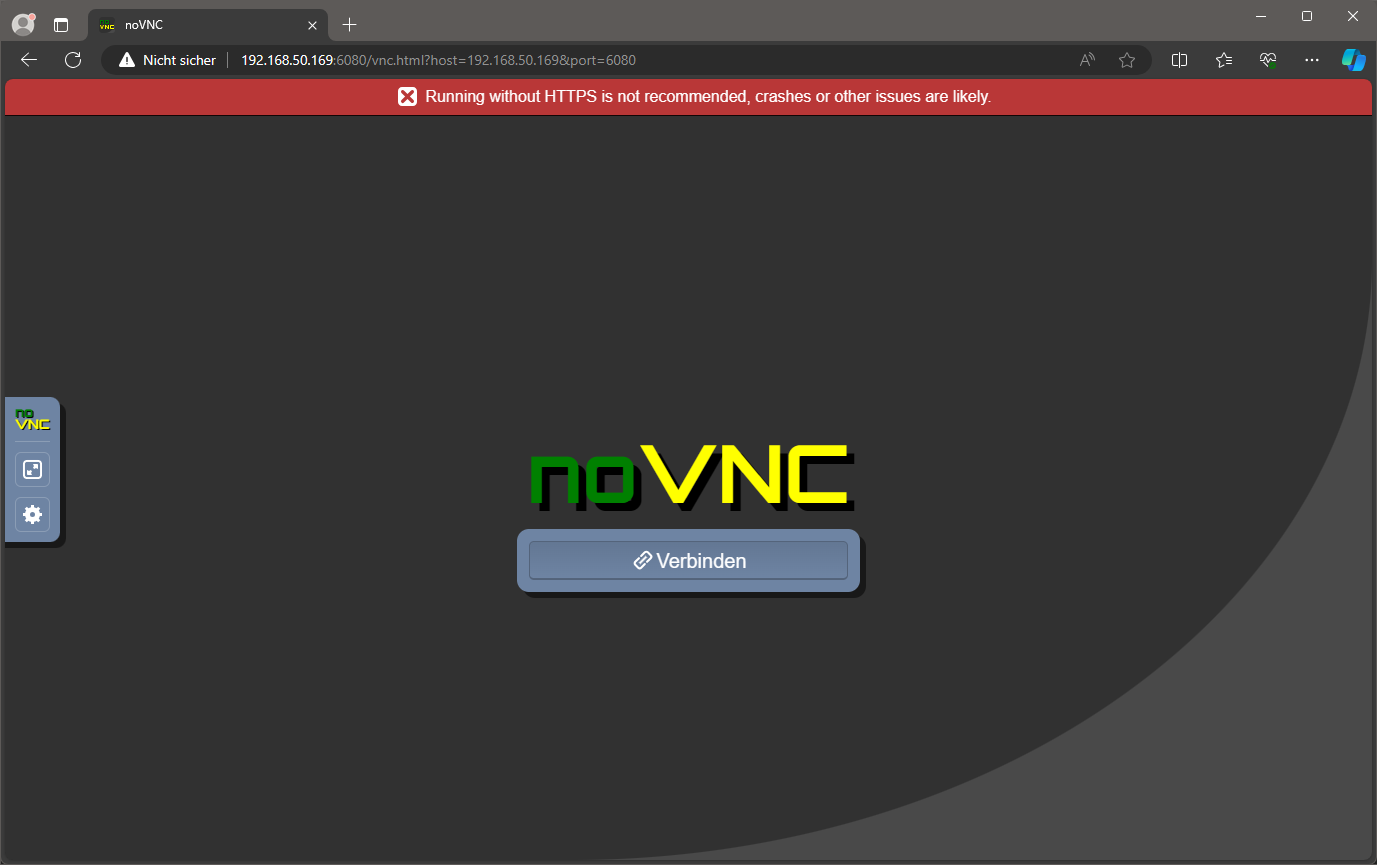
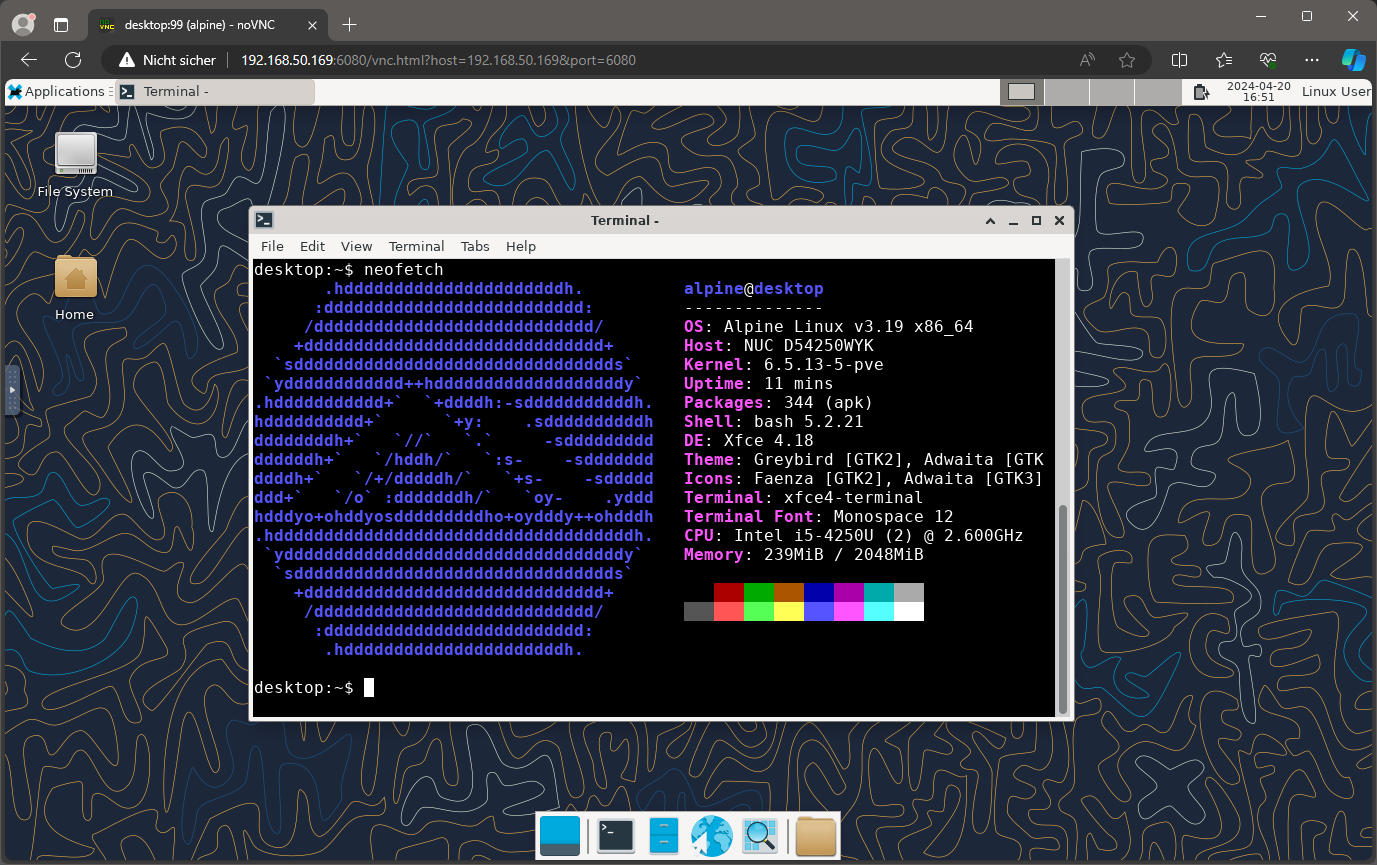
Im Browser die URL aufrufen und einloggen. (Hostname durch IP ersetzen.)
http://192.168.50.189:6080/vnc.html?host=192.168.50.189&port=6080
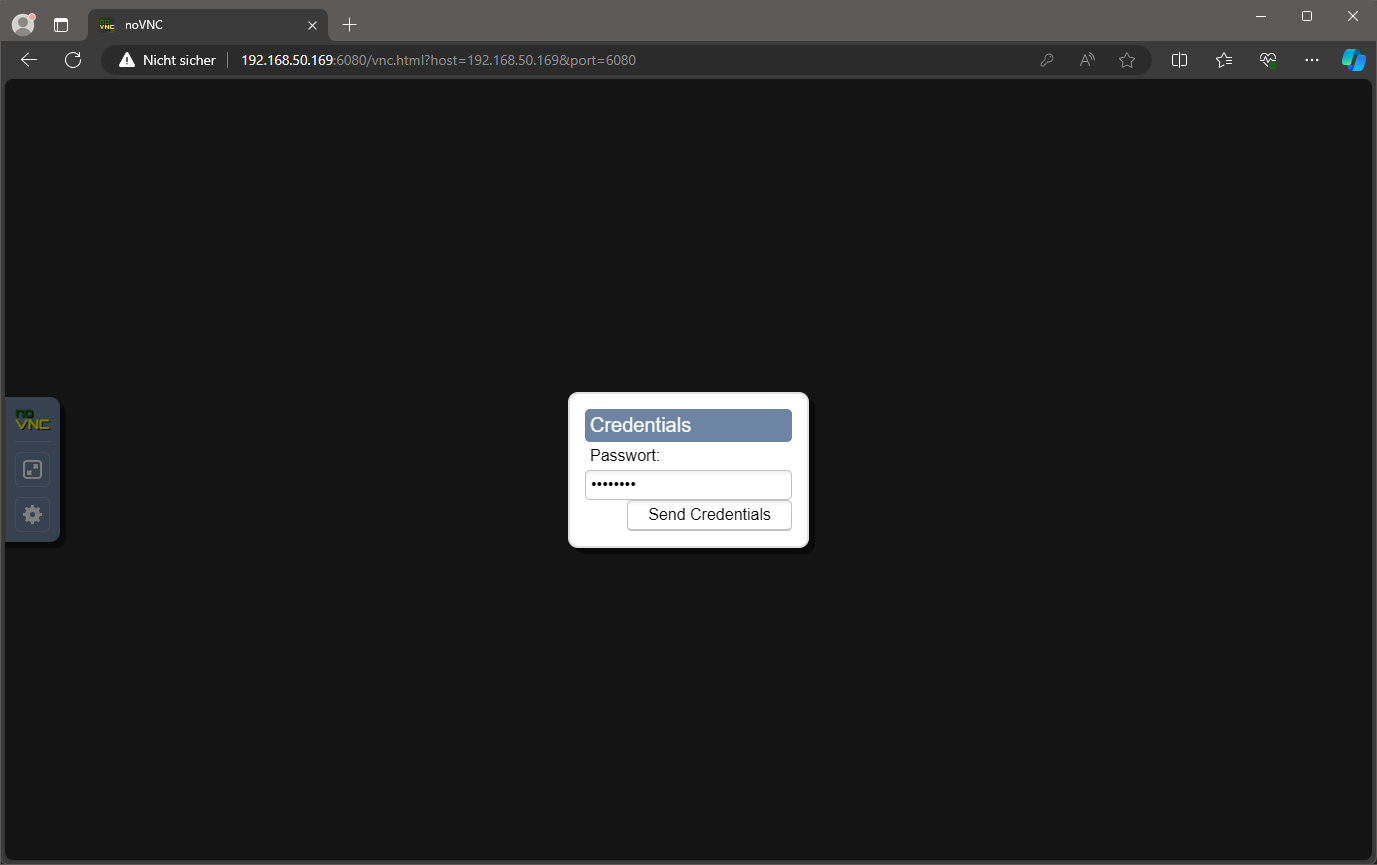
Anmeldung.
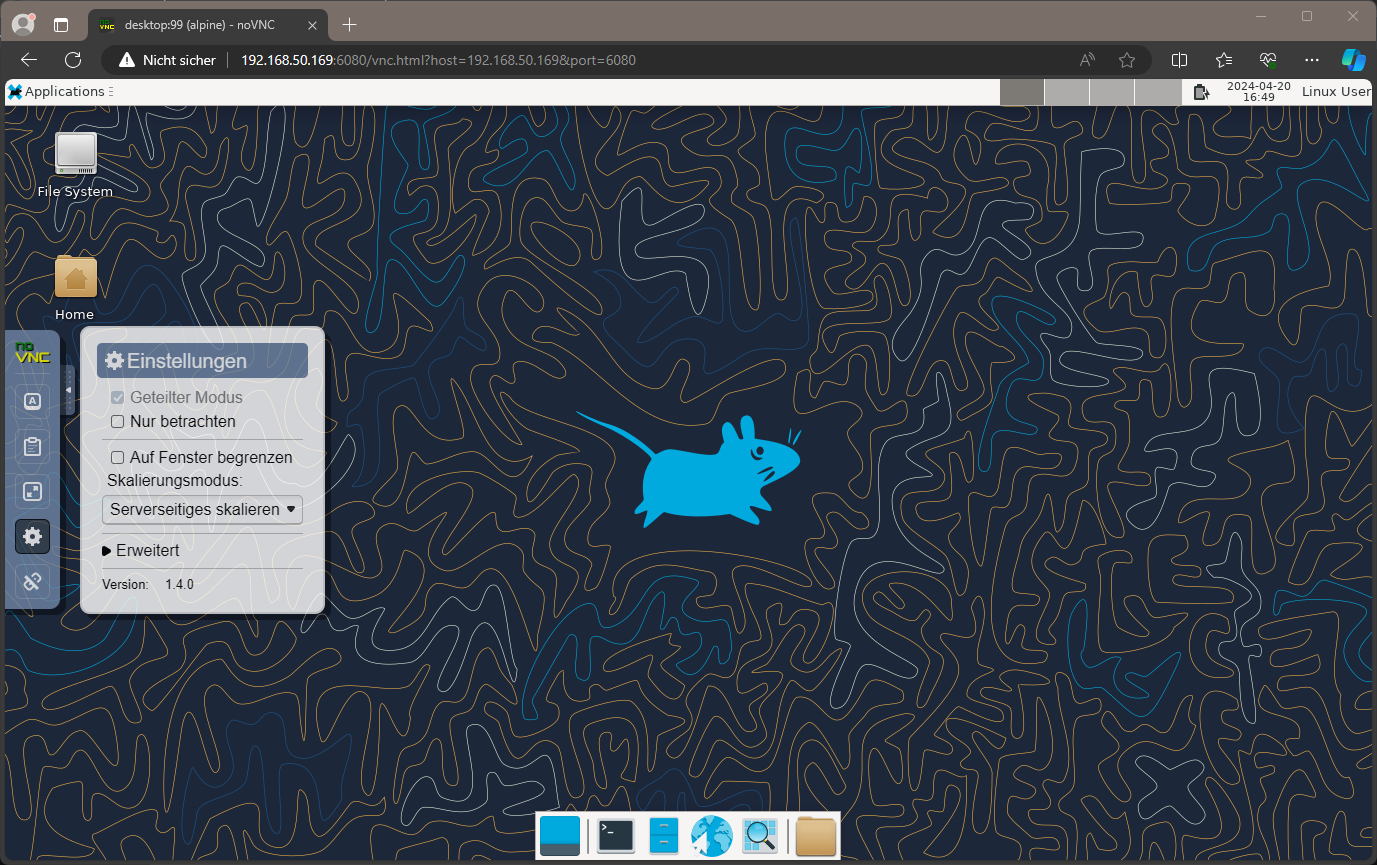
Um im Browser auf Vollbild zu skalieren, in den Einstellungen Serverseitiges skalieren auswählen.
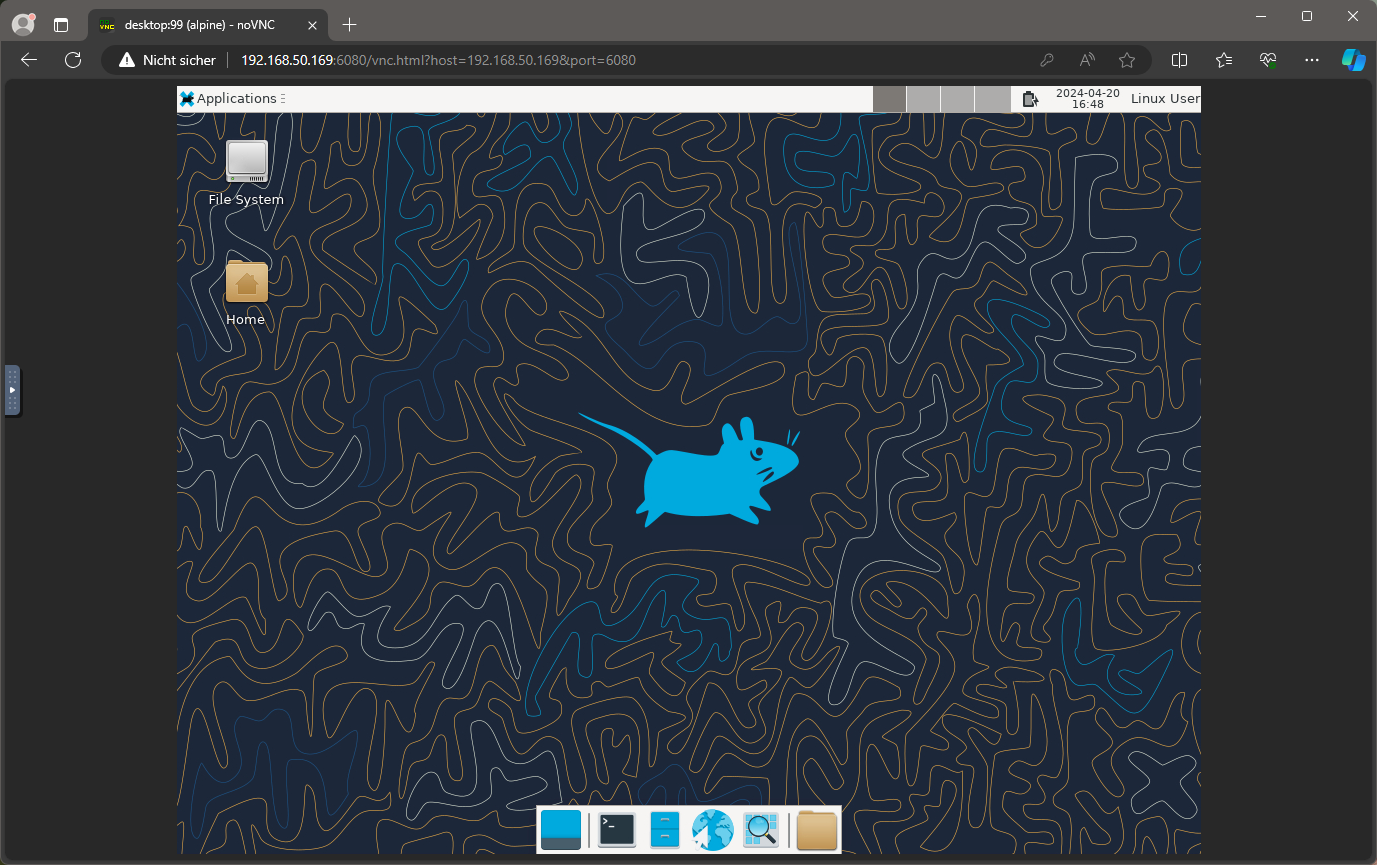
Fertig.
Was noch fehlt oder benötigt wird, kann natürlich nachinstalliert werden. Optionale Pakete.
apk add --no-cache htop ncdu neofetch chromium xfce4-taskmanager xfce4-screenshooter
Autostart
Damit nach einem reboot auch der vncserver und novnc-proxy als alpine user gestartet werden, die local.d scripts aktivieren.
rc-update add local default
Die Datei /etc/local.d/vnc-novnc.start mit folgendem Inhalt erstellen.
#!/bin/bash
/bin/su -c "/usr/bin/vncserver :99" - alpine &
/bin/su -c "/opt/noVNC/utils/novnc_proxy --vnc localhost:5999" - alpine &
und ausführbar machen.
chmod +x /etc/local.d/vnc-novnc.start
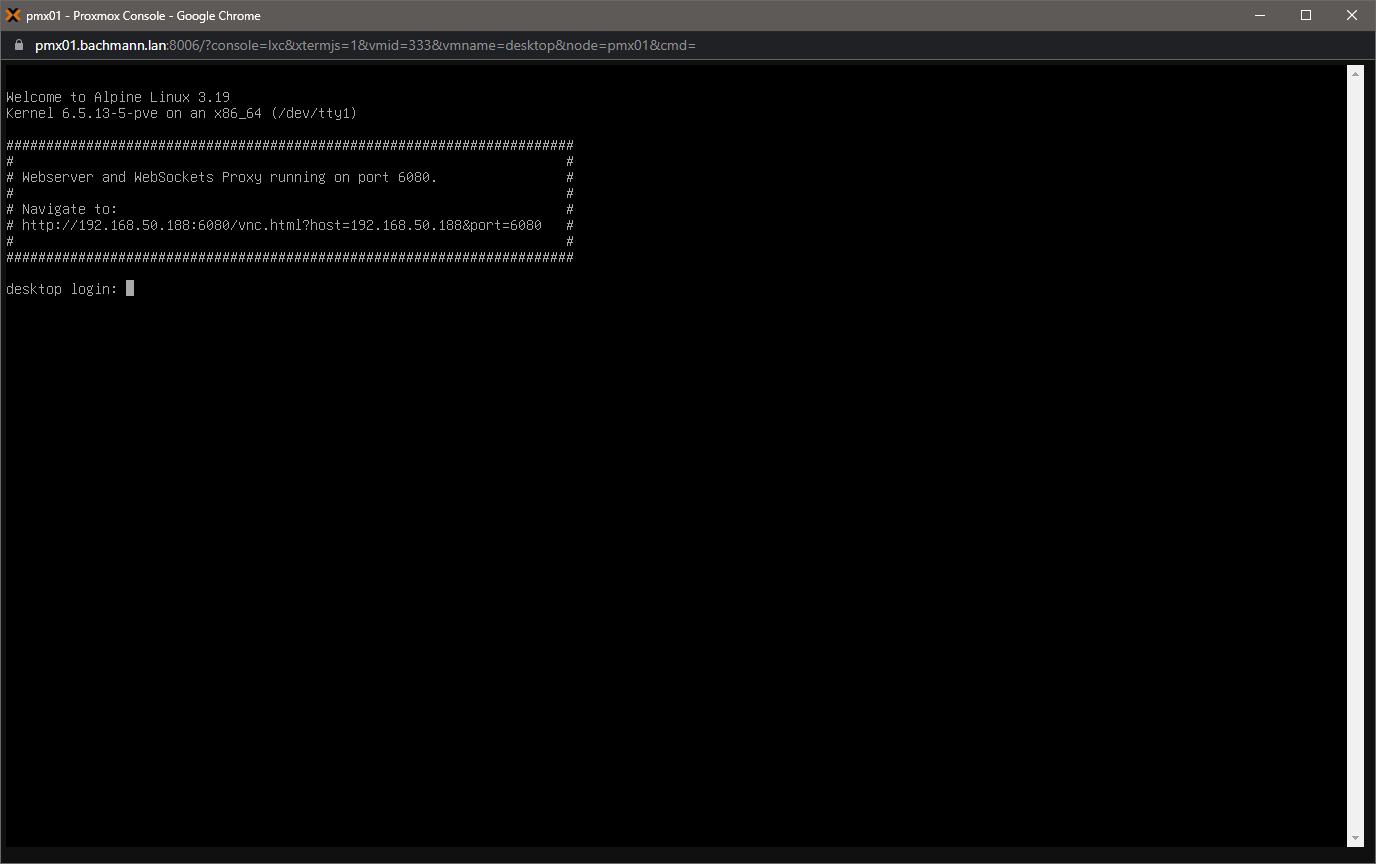
Im Terminal hätte ich vor dem login noch gerne die URL. Die /etc/issue sieht bei mir jetzt so aus.
Welcome to Alpine Linux 3.17
Kernel \r on an \m (\l)

#######################################################################
#                                                                     #
# Webserver and WebSockets Proxy running on port 6080.                #
#                                                                     #
# Navigate to:                                                        #
# http://192.168.50.188:6080/vnc.html?host=192.168.50.188&port=6080   #
#                                                                     #
#######################################################################
Info vor dem login.
Man findet selten so perfekte Anleitungen. Respekt!
Ein Hinweis:
Nach vncpasswd muss zweimal die Enter Taste gedrückt werden – das hat mich etwas aufgehalten. Ggf einen Hinweis dazu hinzufügen?
Danke, Anleitung aktualisiert.
ich hatte versucht RealVNC zu verwenden, da RealVNC auch Audio mit pulseaudio unterstützt (leider bei mir ohne Erfolg) wäre das echt cool gewesen. Eventuell hat ja jemand sowas schon mal gemacht?